> ## Documentation Index
> Fetch the complete documentation index at: https://docs.bluegenai.com/llms.txt
> Use this file to discover all available pages before exploring further.
# Navigation & Interface Guide
> Learn your way around every major element of the BlueGenAI project workspace.
Once you open a project in BlueGenAI you enter the project workspace. The workspace has four tabs — CAB, Tickets, Prototype, and Build — each serving a distinct purpose in your project lifecycle. This page walks you through every element so you can move confidently between them.
***
## The four tabs
Every project workspace has four tabs across the top. Click any tab to switch to that workspace.
| Tab | What it is for |
| --------------------- | ------------------------------------------------------------------------- |
| **CAB** | Analyze an existing legacy system and generate an architectural blueprint |
| **Tickets**\*(Beta)\* | View and manage tickets generated from your requirements |
| **Prototype** | Design your application through prompts and Requirement Folders |
| **Build** | Generate and deploy your full-stack application through prompts |
***
## The CAB tab
CAB — Common Application Blueprint — is where you upload an existing system's artifacts and generate a comprehensive architectural blueprint. It is the starting point for legacy system modernization.
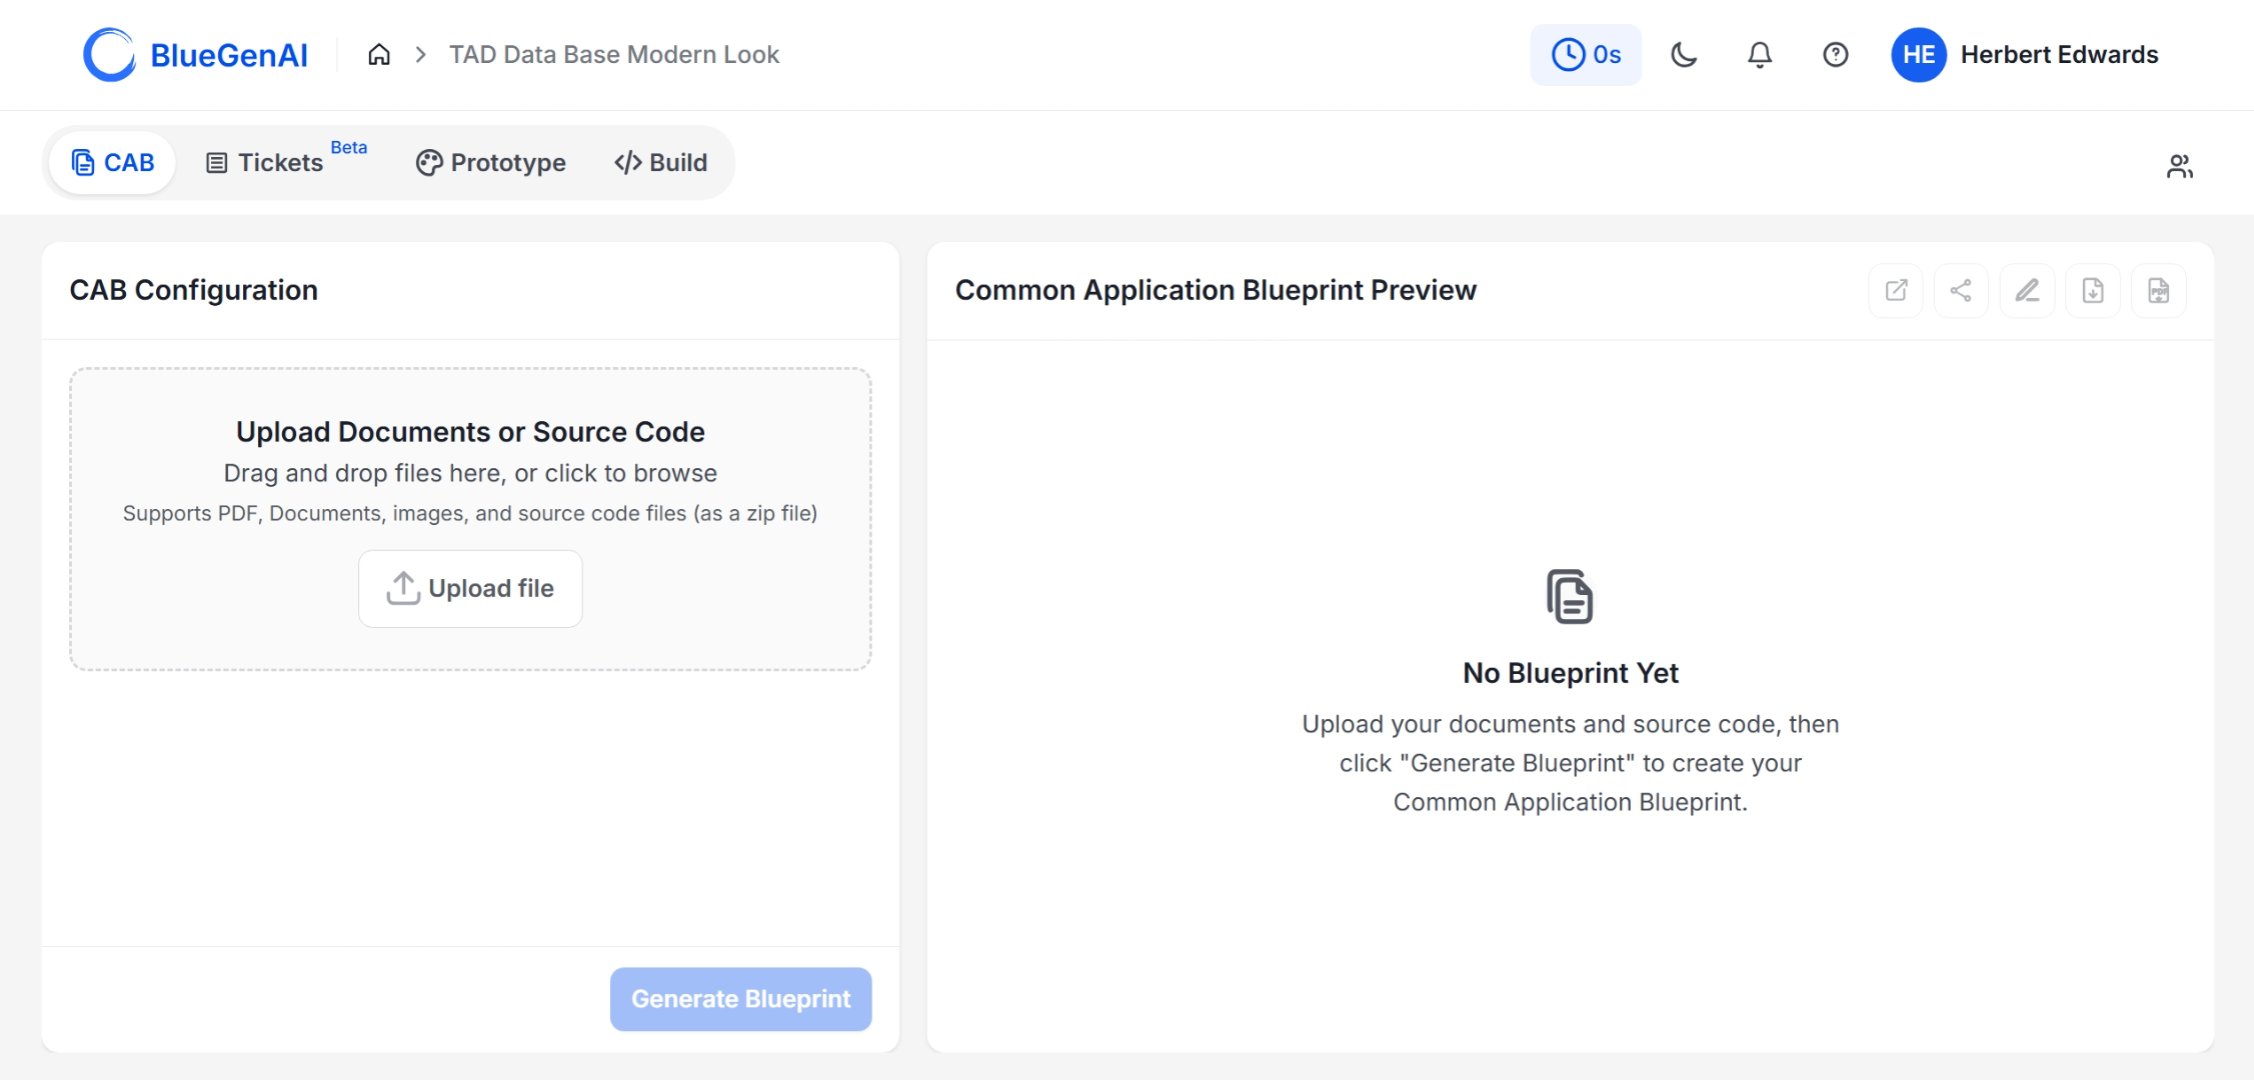 **Left panel — CAB Configuration:**
* Upload area — drag and drop files or click Upload file
* Supports PDF, documents, images, and source code files (as a ZIP)
**Right panel — Common Application Blueprint Preview:**
* Displays the generated blueprint once analysis is complete
* Shows "No Blueprint Yet" until files are uploaded and Generate Blueprint is clicked
**Generate Blueprint button** — starts the CAB analysis pipeline once files are uploaded.
For full guidance on using CAB see [Phase 2 Path B — Modernize a Legacy System](/building-web-apps/phase-2-path-b).
***
## The Tickets tab
The Tickets tab is a project management workspace where tickets generated from your requirements are tracked and managed.
**Left panel — CAB Configuration:**
* Upload area — drag and drop files or click Upload file
* Supports PDF, documents, images, and source code files (as a ZIP)
**Right panel — Common Application Blueprint Preview:**
* Displays the generated blueprint once analysis is complete
* Shows "No Blueprint Yet" until files are uploaded and Generate Blueprint is clicked
**Generate Blueprint button** — starts the CAB analysis pipeline once files are uploaded.
For full guidance on using CAB see [Phase 2 Path B — Modernize a Legacy System](/building-web-apps/phase-2-path-b).
***
## The Tickets tab
The Tickets tab is a project management workspace where tickets generated from your requirements are tracked and managed.
 **Left panel — Views:**
* All Tickets view with a count badge
**Right panel — Ticket list:**
* Search tickets field
* Four filter dropdowns: Status, Priority, Source, Work Type
* Ticket list area — shows "No tickets found" until tickets are generated
Tickets is currently in Beta. Tickets are generated from approved requirements and represent individual units of work — some assigned to AI, some requiring human action. Full documentation for this tab is coming soon.
***
## The Prototype tab
The Prototype tab is where you design your application. You interact with the Web Application Prototype Design Agent through prompts to generate interactive prototypes, design systems, and visual assets.
**Left panel — Views:**
* All Tickets view with a count badge
**Right panel — Ticket list:**
* Search tickets field
* Four filter dropdowns: Status, Priority, Source, Work Type
* Ticket list area — shows "No tickets found" until tickets are generated
Tickets is currently in Beta. Tickets are generated from approved requirements and represent individual units of work — some assigned to AI, some requiring human action. Full documentation for this tab is coming soon.
***
## The Prototype tab
The Prototype tab is where you design your application. You interact with the Web Application Prototype Design Agent through prompts to generate interactive prototypes, design systems, and visual assets.
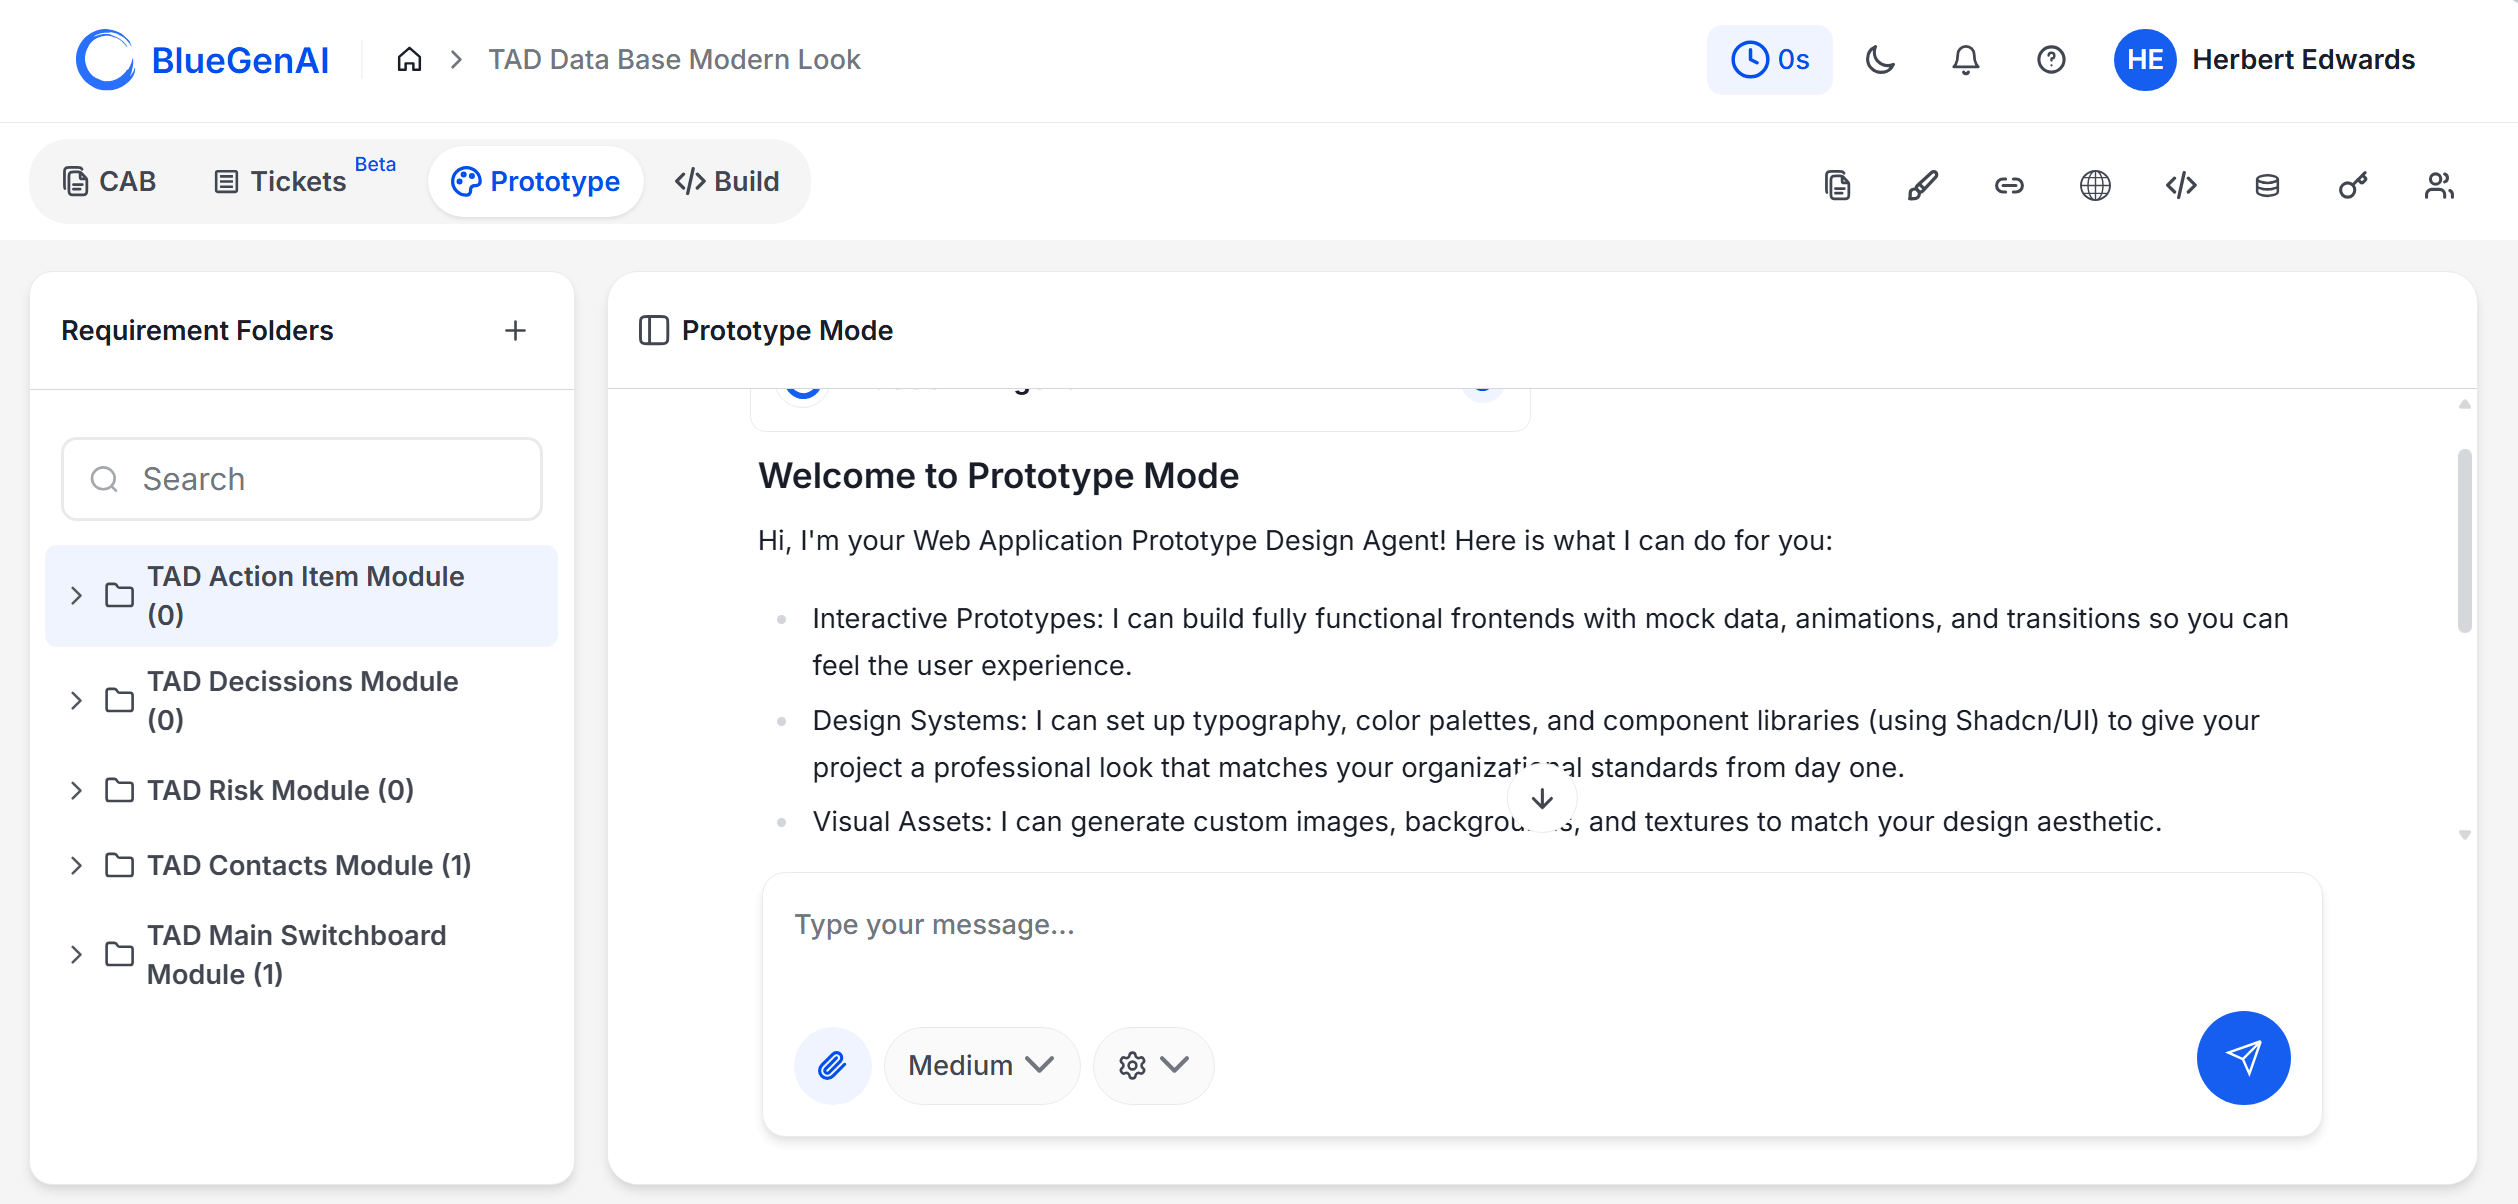 ### Requirement Folders panel (left)
Requirement Folders organize your design work by feature area, screen, or workflow step.
* Click **+** to add a new folder
* Use the **Search** field to find folders by name
* Click any folder to work within it
* Each folder shows a count of items inside
### Chat workspace (right)
* **Welcome message** — the Prototype Design Agent introduces itself and its capabilities when you first open the tab
* **Chat history** — prompts and responses appear here as you work
* **Type your message** — the prompt input field at the bottom
### Chat input toolbar
| Element | What it does |
| ----------------------------- | ----------------------------------------------------------------------------------------------------------------------------------------------------------------------------------- |
| **📎 Attachment** | Attach files directly to your prompt — documents, source code, images, screenshots, spreadsheets, transcripts, and more. Works the same way as attaching files in any AI chat tool. |
| **Medium ▾** | Select the AI model tier for this prompt — Medium or High. Higher tiers produce more thorough results but consume more credits. |
| **⚙️ ▾** | Additional settings for the prompt |
| **Send button** (blue circle) | Submit your prompt to the agent |
You can attach virtually anything to a prompt in the chat — PDFs, Word documents, PowerPoint files, source code, ZIP archives, images, screenshots, CSVs, and plain text files. If you can attach it to an email, you can attach it here.
***
## The Build tab
The Build tab is where you generate and deploy your full-stack application. It uses the same chat interface as the Prototype tab but without the Requirement Folders panel — the full workspace is dedicated to the build conversation.
### Requirement Folders panel (left)
Requirement Folders organize your design work by feature area, screen, or workflow step.
* Click **+** to add a new folder
* Use the **Search** field to find folders by name
* Click any folder to work within it
* Each folder shows a count of items inside
### Chat workspace (right)
* **Welcome message** — the Prototype Design Agent introduces itself and its capabilities when you first open the tab
* **Chat history** — prompts and responses appear here as you work
* **Type your message** — the prompt input field at the bottom
### Chat input toolbar
| Element | What it does |
| ----------------------------- | ----------------------------------------------------------------------------------------------------------------------------------------------------------------------------------- |
| **📎 Attachment** | Attach files directly to your prompt — documents, source code, images, screenshots, spreadsheets, transcripts, and more. Works the same way as attaching files in any AI chat tool. |
| **Medium ▾** | Select the AI model tier for this prompt — Medium or High. Higher tiers produce more thorough results but consume more credits. |
| **⚙️ ▾** | Additional settings for the prompt |
| **Send button** (blue circle) | Submit your prompt to the agent |
You can attach virtually anything to a prompt in the chat — PDFs, Word documents, PowerPoint files, source code, ZIP archives, images, screenshots, CSVs, and plain text files. If you can attach it to an email, you can attach it here.
***
## The Build tab
The Build tab is where you generate and deploy your full-stack application. It uses the same chat interface as the Prototype tab but without the Requirement Folders panel — the full workspace is dedicated to the build conversation.
 * No left panel — the entire workspace is the chat area
* The same chat input toolbar as Prototype: attachment, model selector, settings, send
* Build conversations are separate from Prototype conversations — attach your design files in your first Build prompt
The Build tab starts a fresh conversation. The agent does not automatically see your Prototype chat history. Attach your relevant design files and include key context in your first Build prompt.
***
## The toolbar
The toolbar runs across the top right of the workspace and is available in both Prototype and Build tabs. It gives you access to project tools without leaving your current conversation.
| Icon | Tool | What it does |
| -------- | ----------------- | ------------------------------------------------------------ |
| 📄 | **Files** | View all project files — system-generated and uploaded |
| ✏️ | **Design System** | Apply themes, colors, and typography without writing prompts |
| 🔗 | **Link** | Access shareable links for your project outputs |
| 🌐 | **URLs** | View live endpoints for your deployed application |
| **\** | **Code** | Browse and interact with the generated source code |
| 🗄️ | **Database** | View and manage your application's database |
| 🔑 | **Credentials** | Manage API keys and environment variables |
| 📋 | **Checklist** | Access project checklist and task tracking |
| 👤 | **Collaboration** | Manage team members and sharing settings |
### Application URLs panel
Clicking the **URLs** icon opens the Application URLs panel. This is where your deployed application endpoints appear after a successful build.
* No left panel — the entire workspace is the chat area
* The same chat input toolbar as Prototype: attachment, model selector, settings, send
* Build conversations are separate from Prototype conversations — attach your design files in your first Build prompt
The Build tab starts a fresh conversation. The agent does not automatically see your Prototype chat history. Attach your relevant design files and include key context in your first Build prompt.
***
## The toolbar
The toolbar runs across the top right of the workspace and is available in both Prototype and Build tabs. It gives you access to project tools without leaving your current conversation.
| Icon | Tool | What it does |
| -------- | ----------------- | ------------------------------------------------------------ |
| 📄 | **Files** | View all project files — system-generated and uploaded |
| ✏️ | **Design System** | Apply themes, colors, and typography without writing prompts |
| 🔗 | **Link** | Access shareable links for your project outputs |
| 🌐 | **URLs** | View live endpoints for your deployed application |
| **\** | **Code** | Browse and interact with the generated source code |
| 🗄️ | **Database** | View and manage your application's database |
| 🔑 | **Credentials** | Manage API keys and environment variables |
| 📋 | **Checklist** | Access project checklist and task tracking |
| 👤 | **Collaboration** | Manage team members and sharing settings |
### Application URLs panel
Clicking the **URLs** icon opens the Application URLs panel. This is where your deployed application endpoints appear after a successful build.
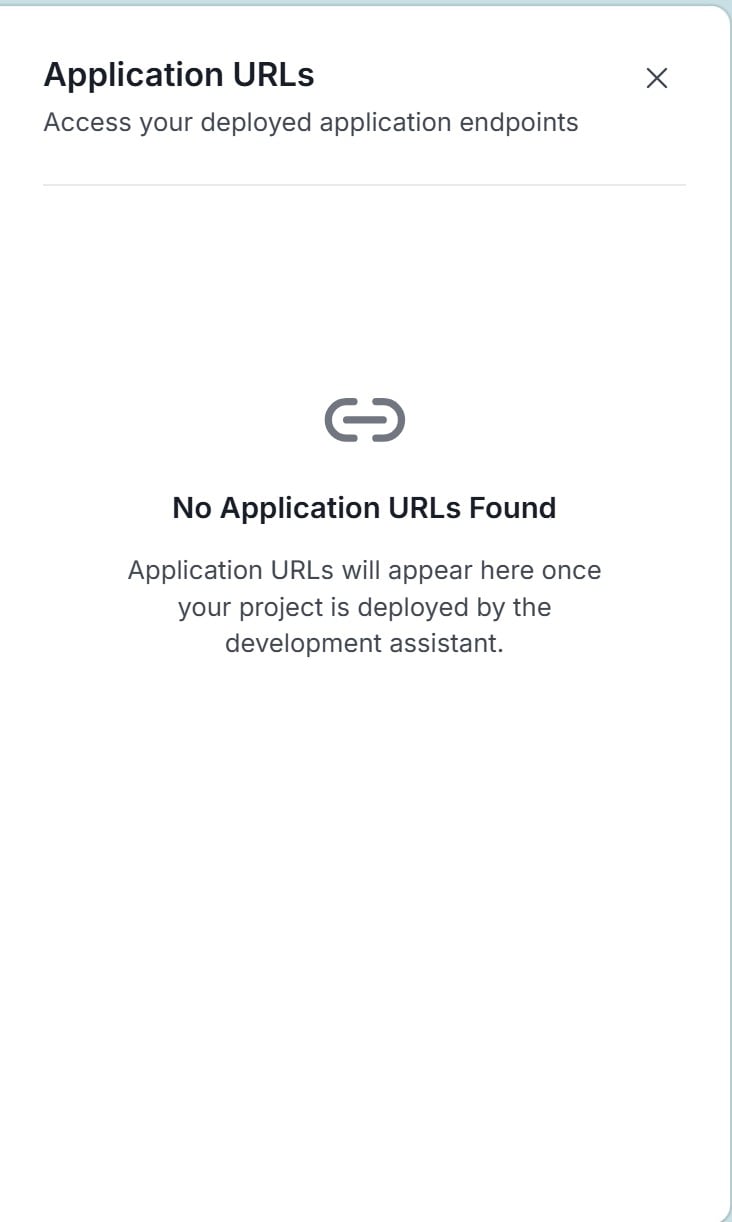 Application URLs populate automatically when your build completes. If you see "No Application URLs Found" it means no build has been deployed in this project yet.
***
## The header
The header appears at the top of every page in the platform.
| Element | What it does |
| ------------------------------------ | ---------------------------------------------------------------------------- |
| **BlueGenAI logo** | Returns you to the Projects dashboard |
| **Breadcrumb** (Home > Project Name) | Shows your current location; click Home to return to the dashboard |
| **Timer** (🕐 0s) | Tracks time spent on the current session |
| **Dark mode** (🌙) | Switches between light and dark mode |
| **Notifications** (🔔) | Shows platform notifications and alerts |
| **Help** (?) | Opens help and support options |
| **User avatar** | Access account options — Update Profile, My Credits, Change Password, Logout |
| **Collaboration** (👤) | Manage project collaborators — top right of the workspace |
Application URLs populate automatically when your build completes. If you see "No Application URLs Found" it means no build has been deployed in this project yet.
***
## The header
The header appears at the top of every page in the platform.
| Element | What it does |
| ------------------------------------ | ---------------------------------------------------------------------------- |
| **BlueGenAI logo** | Returns you to the Projects dashboard |
| **Breadcrumb** (Home > Project Name) | Shows your current location; click Home to return to the dashboard |
| **Timer** (🕐 0s) | Tracks time spent on the current session |
| **Dark mode** (🌙) | Switches between light and dark mode |
| **Notifications** (🔔) | Shows platform notifications and alerts |
| **Help** (?) | Opens help and support options |
| **User avatar** | Access account options — Update Profile, My Credits, Change Password, Logout |
| **Collaboration** (👤) | Manage project collaborators — top right of the workspace |