> ## Documentation Index
> Fetch the complete documentation index at: https://docs.bluegenai.com/llms.txt
> Use this file to discover all available pages before exploring further.
# Overview
> Prototype Mode mocks up an html-based working front end from prompts, with no backend, so you can see and share an application before committing to build it.
 ## What It Produces
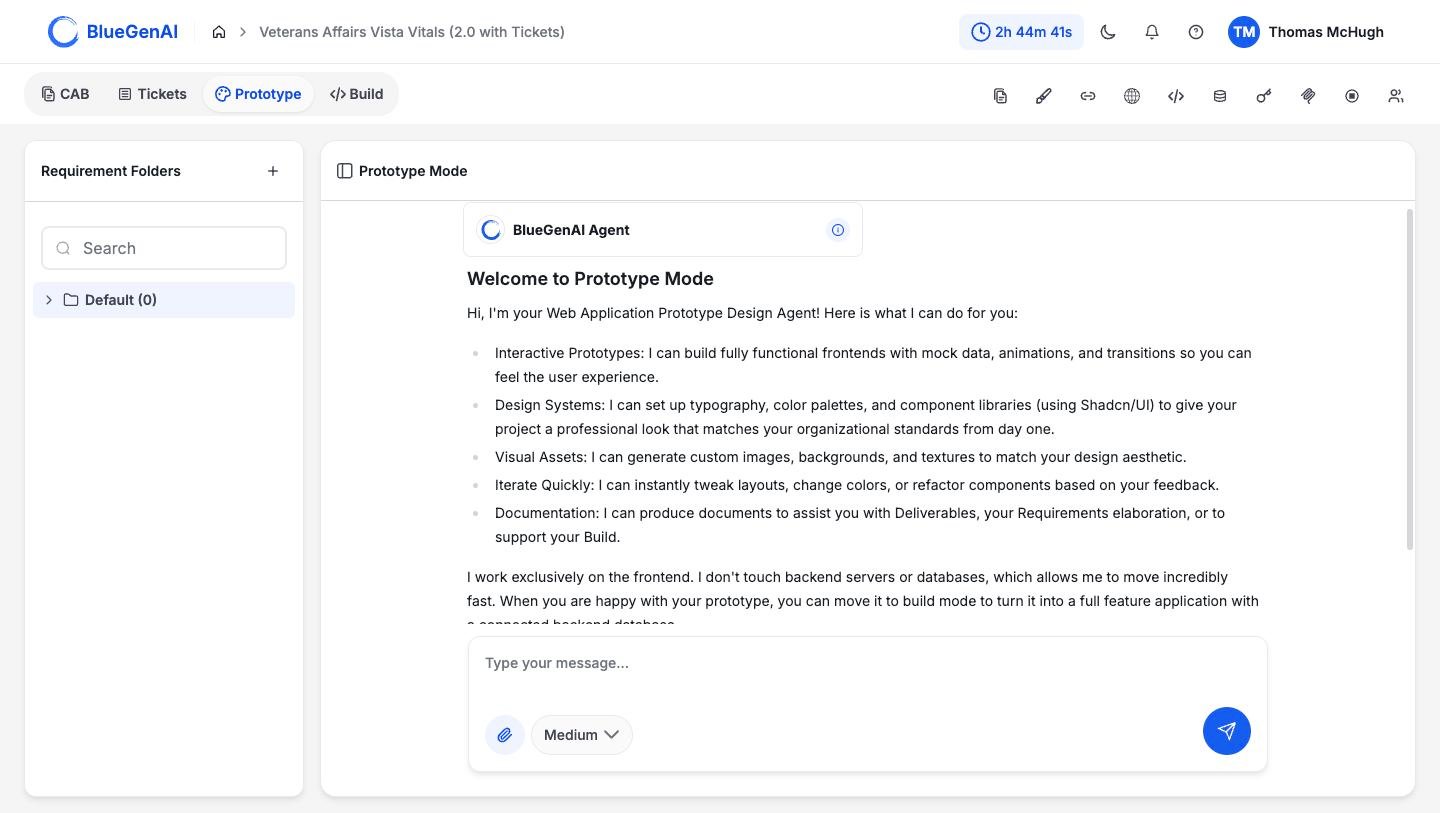
The agent describes its own scope on arrival, and it is worth taking at face value.
* **Interactive prototypes.** Working front ends with mock data, animations, and transitions, so you can feel the experience rather than read about it.
* **Design systems.** Typography, colour palettes, and component libraries, so the result matches your organisation's standards from the start.
* **Visual assets.** Images, backgrounds, and textures generated to match the look you want.
* **Fast iteration.** Layout changes, colour changes, and reworked components in response to feedback.
* **Documents.** Written output to support deliverables, requirements work, or a later build.
## What It Does Not Do
**Prototype Mode works on the front end only.** It does not create backend servers and it does not create databases. Anything that looks like stored data in a prototype is mock data written into the front end.
That limit is the reason it moves quickly. A prototype has no infrastructure to stand up and nothing to migrate when you change your mind.
When you want a working application with real data behind it, that is [Build Mode](/web-apps/build-mode/overview).
## When to Use It
* **You need something to show.** A clickable prototype answers questions a document leaves open, and it does it in front of the person asking.
* **The requirements are still moving.** Changing a prototype costs a prompt. Changing a built application costs a build.
* **You want the look settled first.** Fixing typography and colour here means the build inherits them.
## When Not To
* **You need real data.** Nothing in a prototype persists, and there is no database behind it.
* **You need to test integrations or logins.** Those need a backend, which means Build Mode.
* **The design is already settled.** If you have the screens and the standards, going straight to Build Mode saves a step.
## A Note on Naming
Prototype Mode appears in the address bar as `/design`, and three of the low-code platforms still greet users with the phrase "Design Mode".
They are the same thing. This documentation uses **Prototype Mode** throughout.
## Your Next Step
The fastest way to understand Prototype Mode is to prompt it once and look at what comes back.
Requirement Folders, the panel rail, and the Design System.
What moves between modes, and what does not.
## Related topics
- [Overview](/web-apps/build-mode/overview.md)
## What It Produces
The agent describes its own scope on arrival, and it is worth taking at face value.
* **Interactive prototypes.** Working front ends with mock data, animations, and transitions, so you can feel the experience rather than read about it.
* **Design systems.** Typography, colour palettes, and component libraries, so the result matches your organisation's standards from the start.
* **Visual assets.** Images, backgrounds, and textures generated to match the look you want.
* **Fast iteration.** Layout changes, colour changes, and reworked components in response to feedback.
* **Documents.** Written output to support deliverables, requirements work, or a later build.
## What It Does Not Do
**Prototype Mode works on the front end only.** It does not create backend servers and it does not create databases. Anything that looks like stored data in a prototype is mock data written into the front end.
That limit is the reason it moves quickly. A prototype has no infrastructure to stand up and nothing to migrate when you change your mind.
When you want a working application with real data behind it, that is [Build Mode](/web-apps/build-mode/overview).
## When to Use It
* **You need something to show.** A clickable prototype answers questions a document leaves open, and it does it in front of the person asking.
* **The requirements are still moving.** Changing a prototype costs a prompt. Changing a built application costs a build.
* **You want the look settled first.** Fixing typography and colour here means the build inherits them.
## When Not To
* **You need real data.** Nothing in a prototype persists, and there is no database behind it.
* **You need to test integrations or logins.** Those need a backend, which means Build Mode.
* **The design is already settled.** If you have the screens and the standards, going straight to Build Mode saves a step.
## A Note on Naming
Prototype Mode appears in the address bar as `/design`, and three of the low-code platforms still greet users with the phrase "Design Mode".
They are the same thing. This documentation uses **Prototype Mode** throughout.
## Your Next Step
The fastest way to understand Prototype Mode is to prompt it once and look at what comes back.
Requirement Folders, the panel rail, and the Design System.
What moves between modes, and what does not.
## Related topics
- [Overview](/web-apps/build-mode/overview.md)