When you log in to BlueGenAI, you land on the Projects dashboard. This is your home base — where you create new projects, open existing ones, manage collaboration, and track your token usage.
How to log in
Go to BlueGenAI.ai
Enter your Email address
Enter your Password
Optionally check Remember me to stay logged in on this device
Complete the Cloudflare verification if prompted
Click Sign In
If you have forgotten your password, click Forgot password? next to the Password field and follow the reset instructions sent to your email.
How to navigate the Projects dashboard Once logged in you land on the Projects dashboard. The dashboard is organized into three areas: the header, the filters and search bar, and the project tabs.
Element What it does BlueGenAI logo Returns you to the Projects dashboard from anywhere in the platform Dark mode toggle (🌙)Switches between light and dark mode Notifications (🔔)Shows platform notifications and alerts Help (?)Opens help and support options User avatar Access account options — Update Profile, My Credits, Change Password, Logout
Search, sort, and filter Control What it does Search Project Search across your projects by name Last Updated Sort projects by last updated date Application Type Filter projects by platform type — All platforms, Web, Low-Code, Hybrid
Project tabs Tab What it shows My Projects Projects you have created — shown with a count Shared with Me Projects other users have invited you to collaborate on — shown with a count Invitations Pending project invitations you have not yet accepted — shown with a count
Project cards Each project appears as a card showing:
Initials avatar — auto-generated from the project nameProject name — truncated if longApplication type badge — Web, Low-Code, or HybridLast updated — when the project was last modified
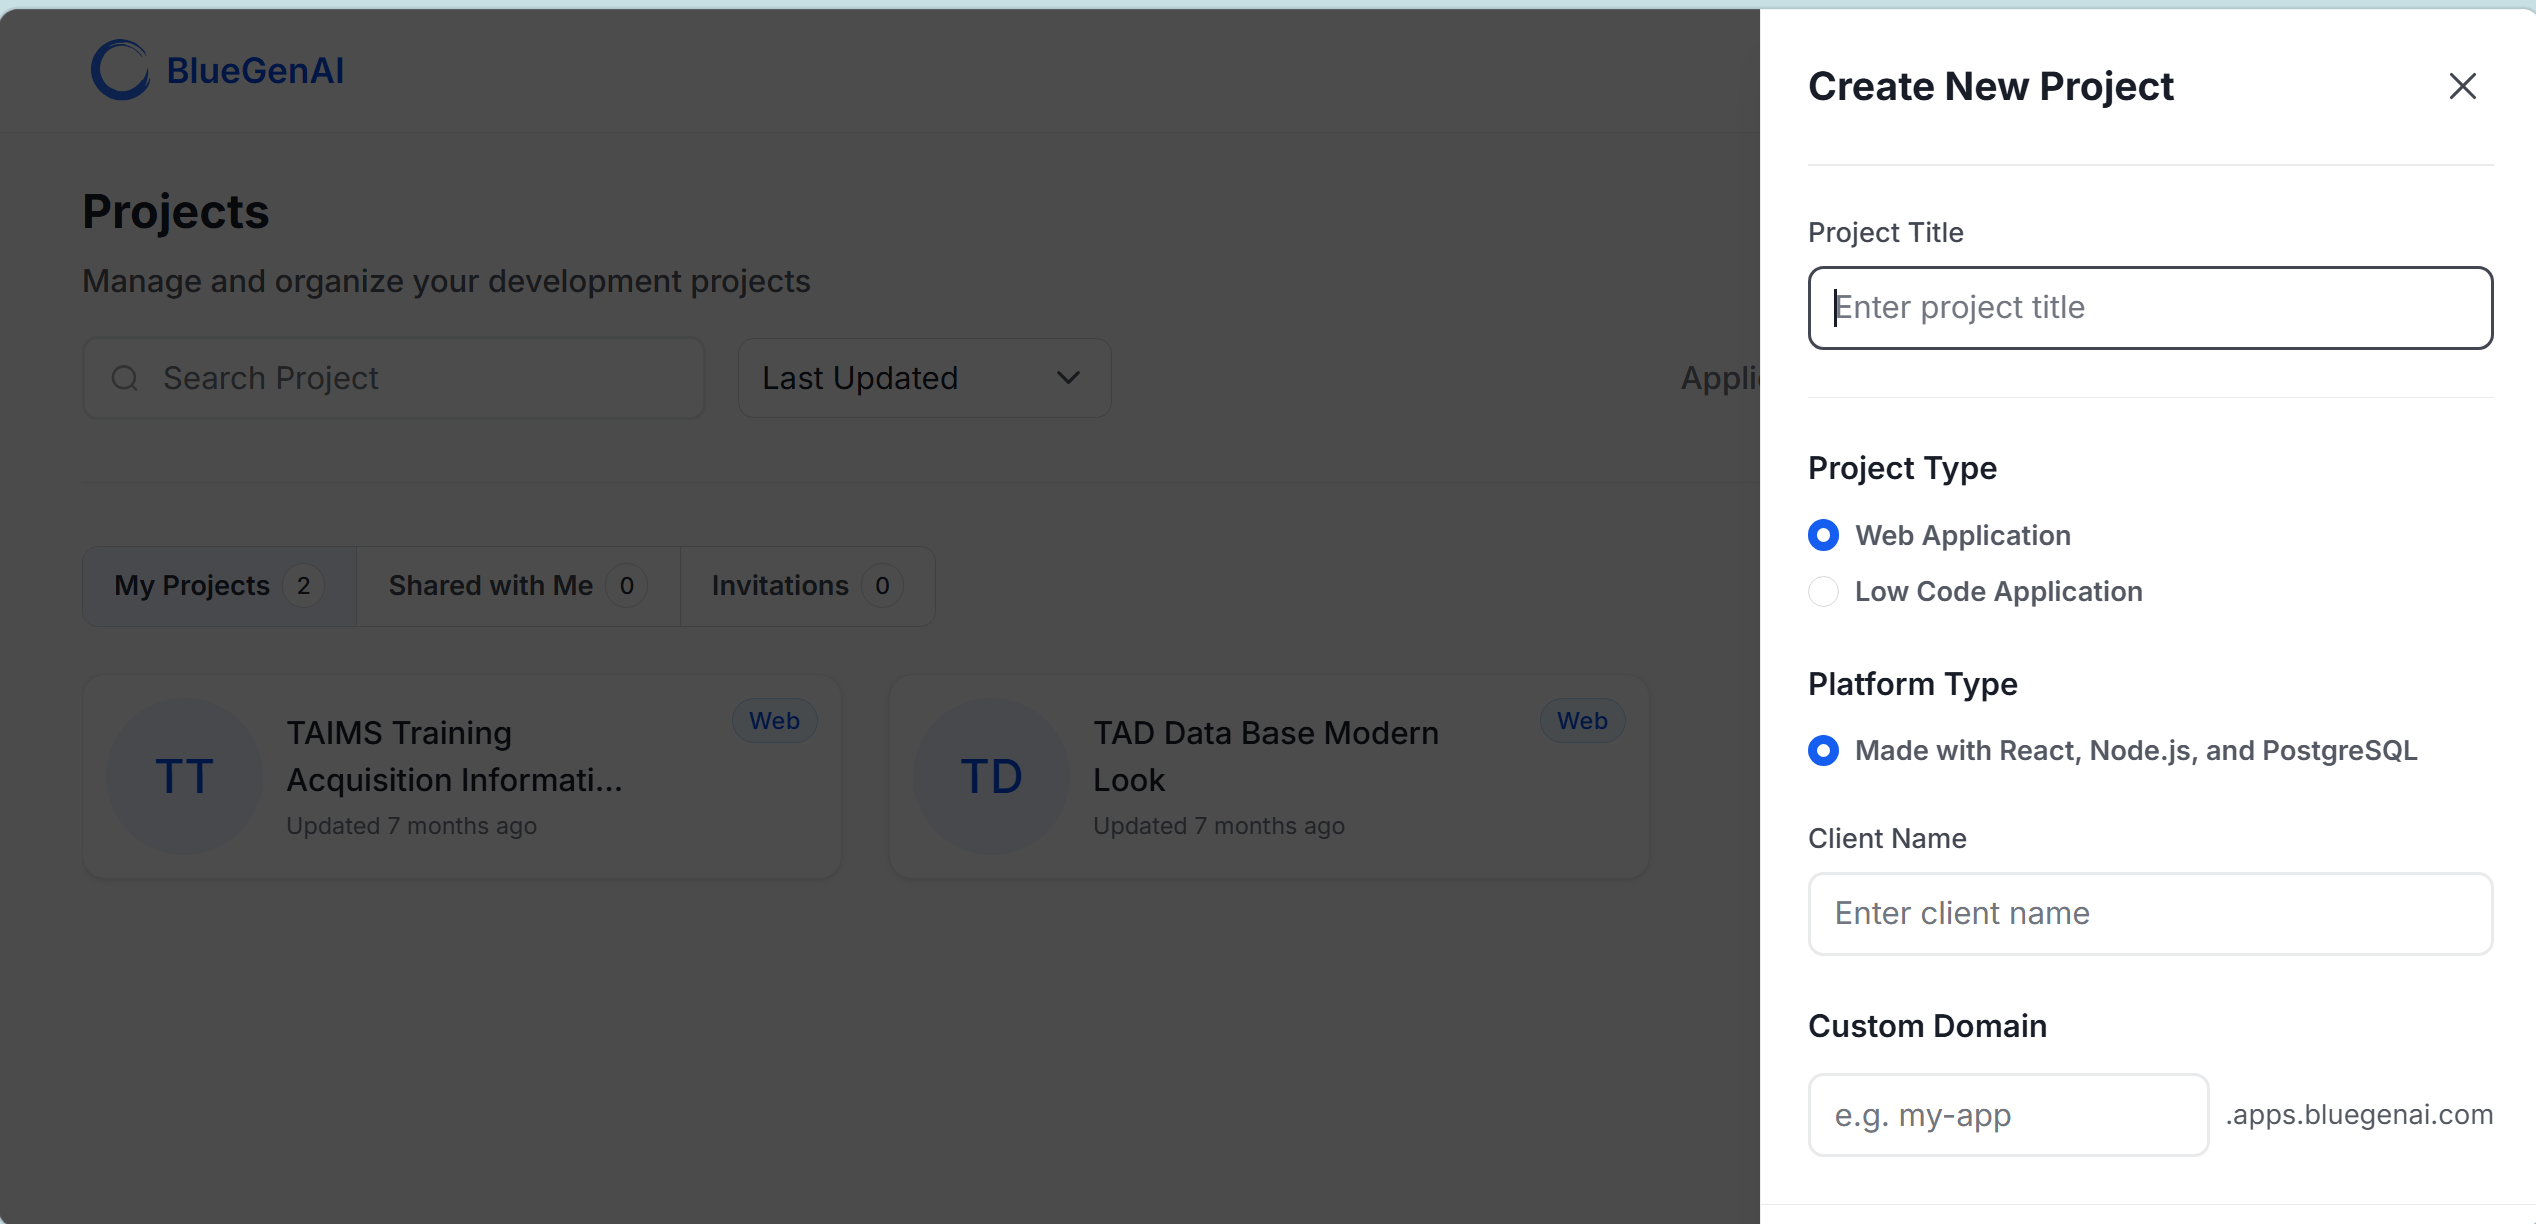
How to create a new project
Click the + Create Project button in the top-right corner of the dashboard
Enter a project title — there are no restrictions on naming
Select a Project Type — Web Application or Low Code Application
Optionally add a client name and custom domain
Click Create — your project opens in the workspace
How to open an existing project
From the My Projects tab, locate the project card
Click the card — the project opens in the mode it was last used
How to find a project shared with you
Click the Shared with Me tab
Projects shared by other users appear here
Click any card to open the project — your access level depends on the role you were assigned
How to accept a project invitation
Click the Invitations tab
Pending invitations appear here with a count badge
Click an invitation to review and accept or decline
How to delete a project Only the project Owner can delete a project.
Locate the project card on the My Projects tab
Click the more options menu (⋯) on the project card
Select Delete Project
Confirm the deletion
Deleting a project is permanent. All project files, design artifacts, build history, and collaboration settings are removed. This action cannot be undone.
Understanding project roles When you create a project you are automatically its Owner. When you invite others they are assigned one of three roles:
Role What they can do Owner Full control — edit, manage collaboration, configure billing, delete the project Editor Contribute to design and build; invite additional collaborators Viewer Read-only access for review and feedback
For full details on inviting collaborators and managing access see Collaboration & Sharing .
Ready to start building?
Quick Start Guide Follow a step-by-step walkthrough to design, build, and deploy your first application.
Navigation & Interface Guide Learn your way around the BlueGenAI workspace, toolbar, and tools.