
The platform landing page is a dashboard listing your projects. Selecting a project opens into that project’s workspace.

The Dashboard Landing Page

Upon signing into BlueGenAI you will land at your Projects Dashboard page.
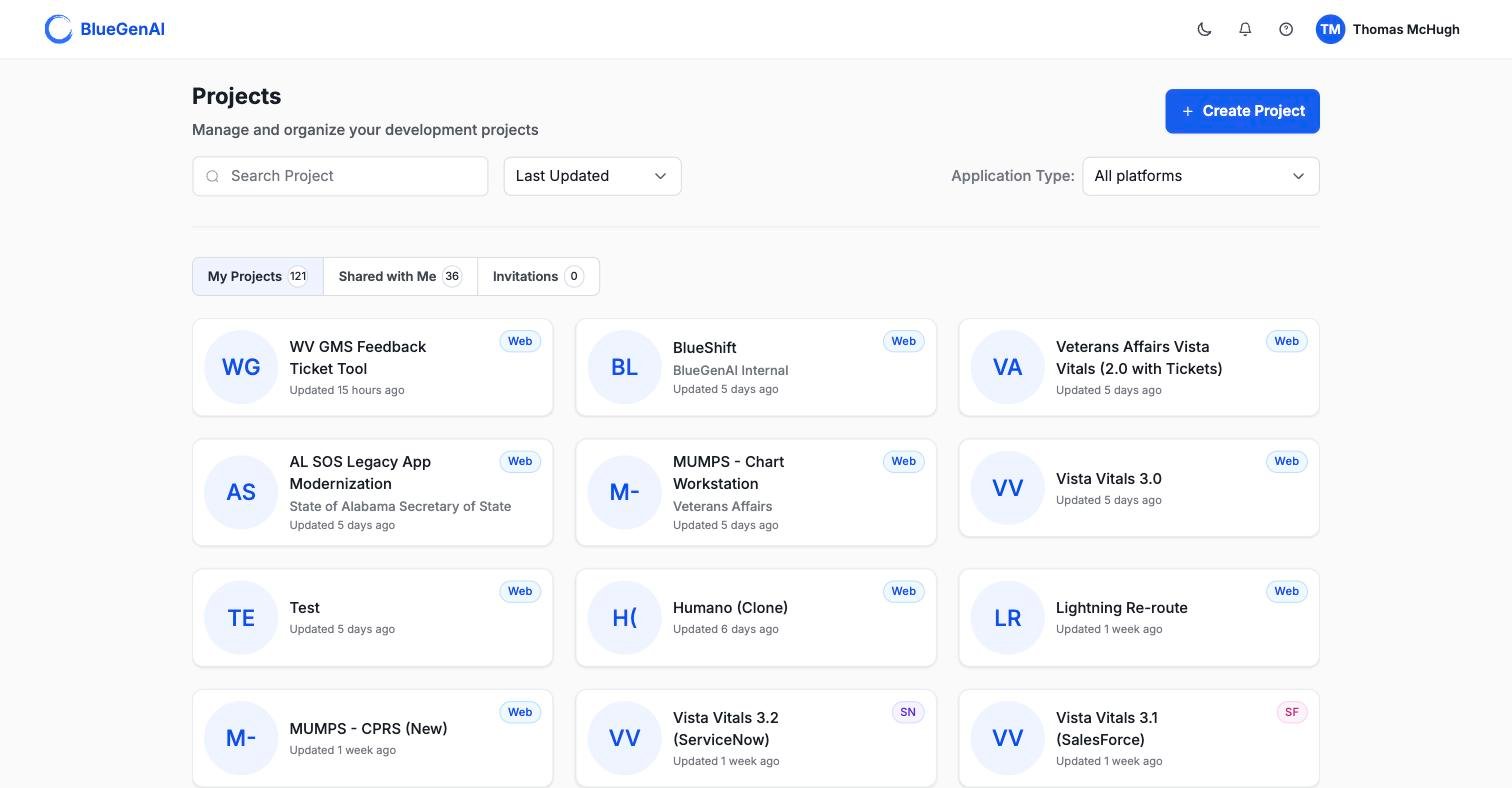
The Projects dashboard showing a search field, an Application Type filter, tabs for My Projects, Shared with Me and Invitations, and a grid of project cards each carrying a platform badge.

The dashboard. Every project you own or can see, with a platform badge on each card.

Your Projects Dashboard has three tabs: My Projects, Shared with Me, and Invitations. You may also Search by name, sort your projects, or filter the list by Application type. My Projects will list all of the projects which you have created. You are the owner of these projects and the primary manager of each of them. Shared with Me shows projects which you have access to. This means that the project owner has added you via the Collaboration Mode. Your access rights and permissions for each project may vary according to the owner’s settings. Invitations displays any project to which you have been added but have not yet accepted. Once accepted here, the project will no longer show on Invitations and will instead show on the Shared with Me tab Each card shows the project name, an optional client label, when it was last updated, and a badge naming the technology platform for that application: Web, TAP, SN, or SF. Hovering a card reveals a menu with Open, Edit, Clone, Manage Collaborations, and Delete.
The BlueGenAI Platform currently supports 5 technology stacks: Web - Web Application TAP - Tyler Application Platform SN - ServiceNow SF - Salesforce PA - Microsoft PowerApps

Your Project Workspace

Opening a project takes you to its workspace. Note that Web projects and low-code projects may have slightly different workspaces. For all projects your initial project landing space will be the CAB (Common Application Blueprint.) From here you can navigate throughout the project’s available modes.
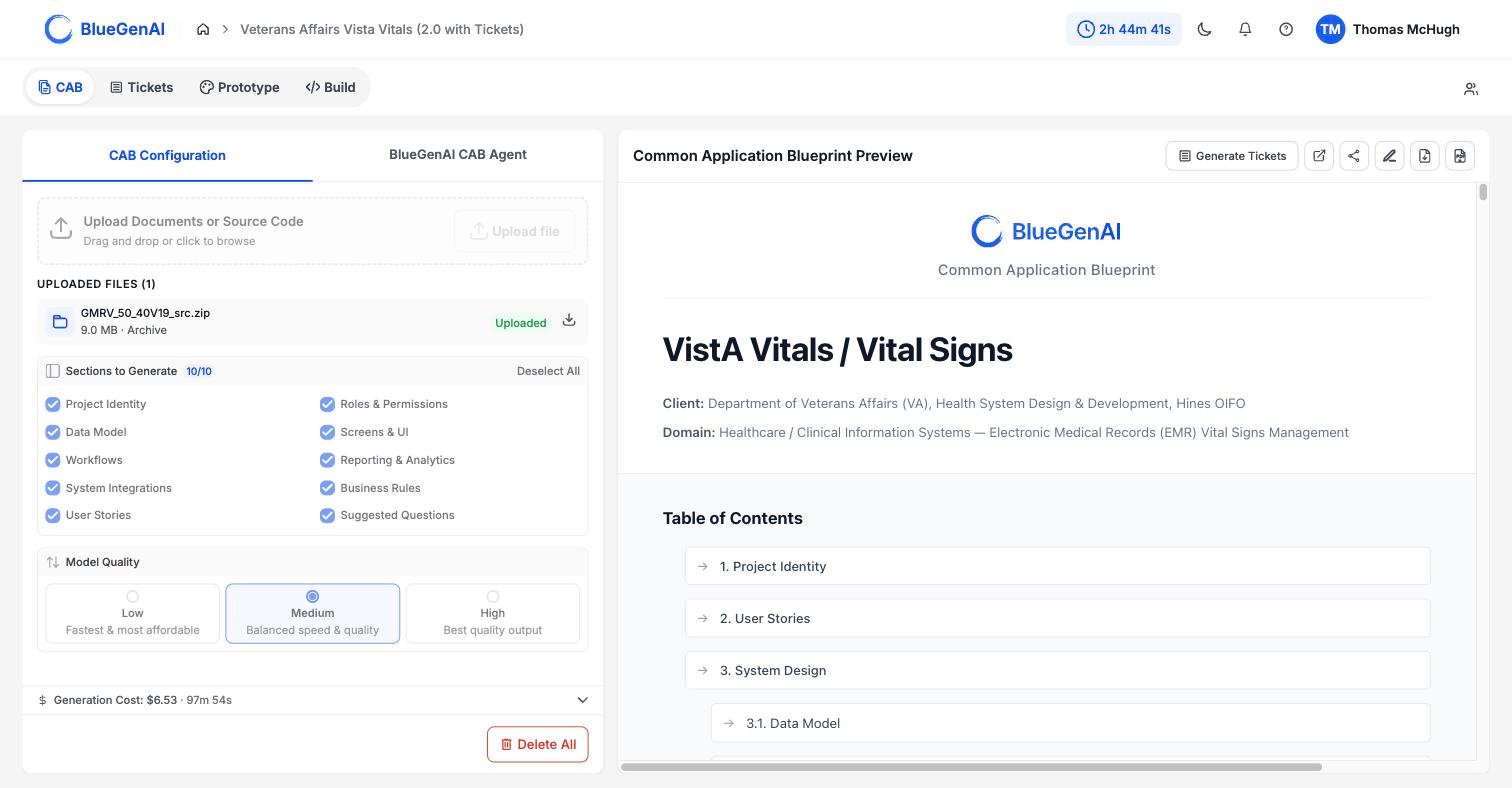
A project workspace showing mode tabs for CAB, Tickets, Prototype and Build, with a two-pane layout below and a row of panel icons at the top right.

A project workspace. The four modes sit top left, the panel controls top right.

The Four Modes

The Project workspace has four modes*, selected from the tabs at the top left. Selecting these pill icons allows you to access the rest of the application workspaces.
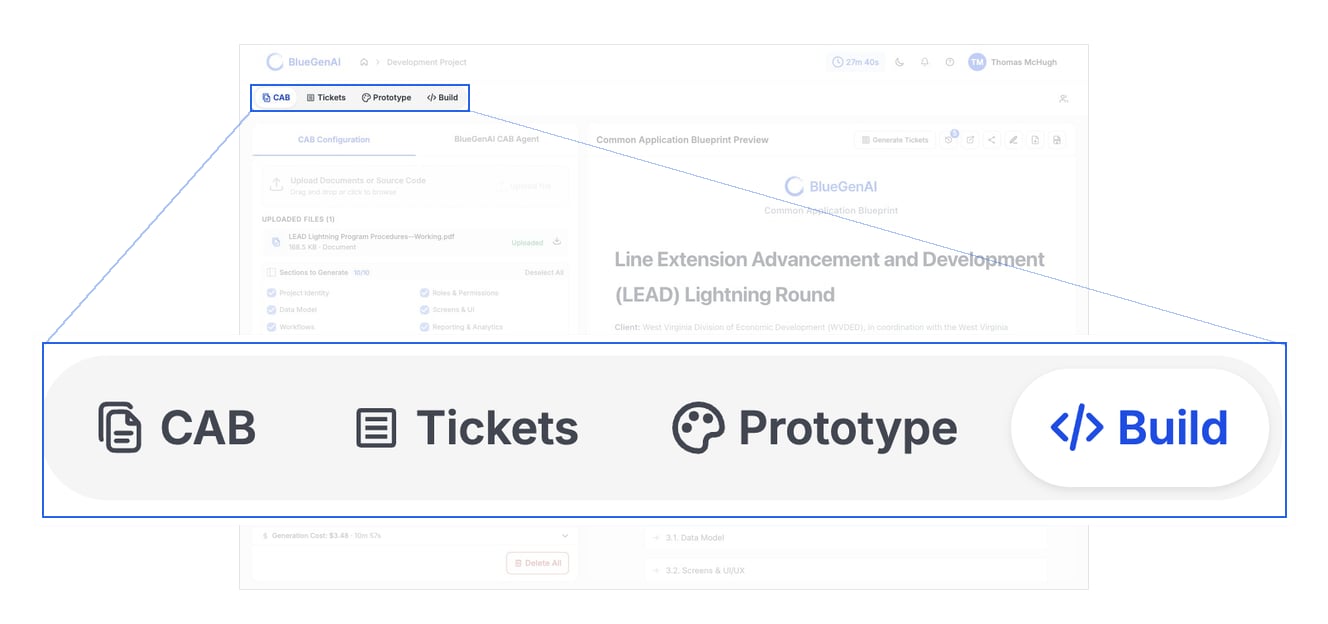
Note that some application types will not include Prototype mode.
A magnified view of the mode tab bar showing the CAB, Tickets, Prototype and Build tabs with Build selected, set against a faded view of the whole workspace so the bar's position on the page is clear.

The mode tab bar, at the top left of every project workspace.

These are modes, not pages. Switching mode changes the whole workspace, and what tools are available to you. Your place in each mode is remembered when you come back.

The Panel Rail

The icons at the top right open panels beside your work and will change depending on the Mode.
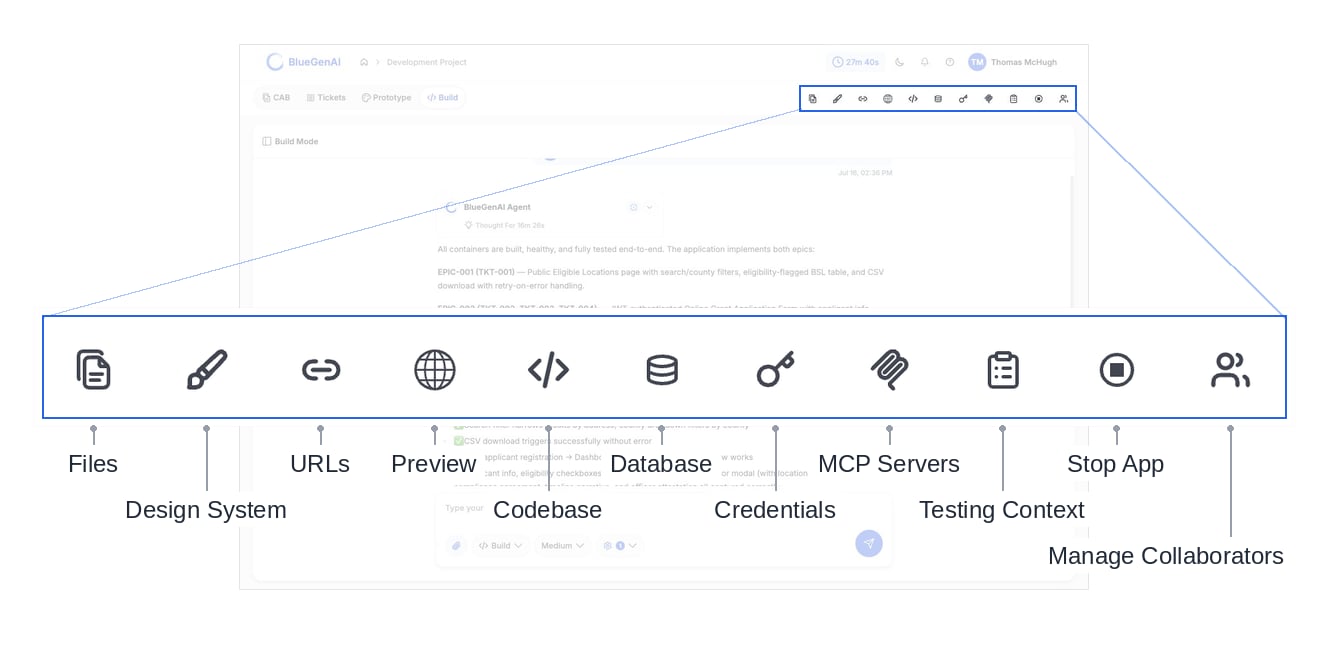
A magnified view of the eleven panel rail icons in Build Mode, each labelled: Files, Design System, URLs, Preview, Codebase, Database, Credentials, MCP Servers, Testing Context, Stop App and Manage Collaborators, set against a faded view of the workspace so the rail's position at the top right is clear.

The panel rail in Build Mode, with every icon named.

You may Hover over any of the icons for about a second to see its name and function.

The Top Bar

The top bar carries a dark-mode toggle, a notifications bell, a help link, and your account menu. A breadcrumb to the left shows which project you are in, with a home icon back to the dashboard. It also carries a counter. The Counter is the total AI processing time accumulated on this project: the sum of every agent operation ever run against it. It is not a clock on your current session, and it does not reset. It advances whenever an agent does work, including blueprint generation, change-impact review, and builds.
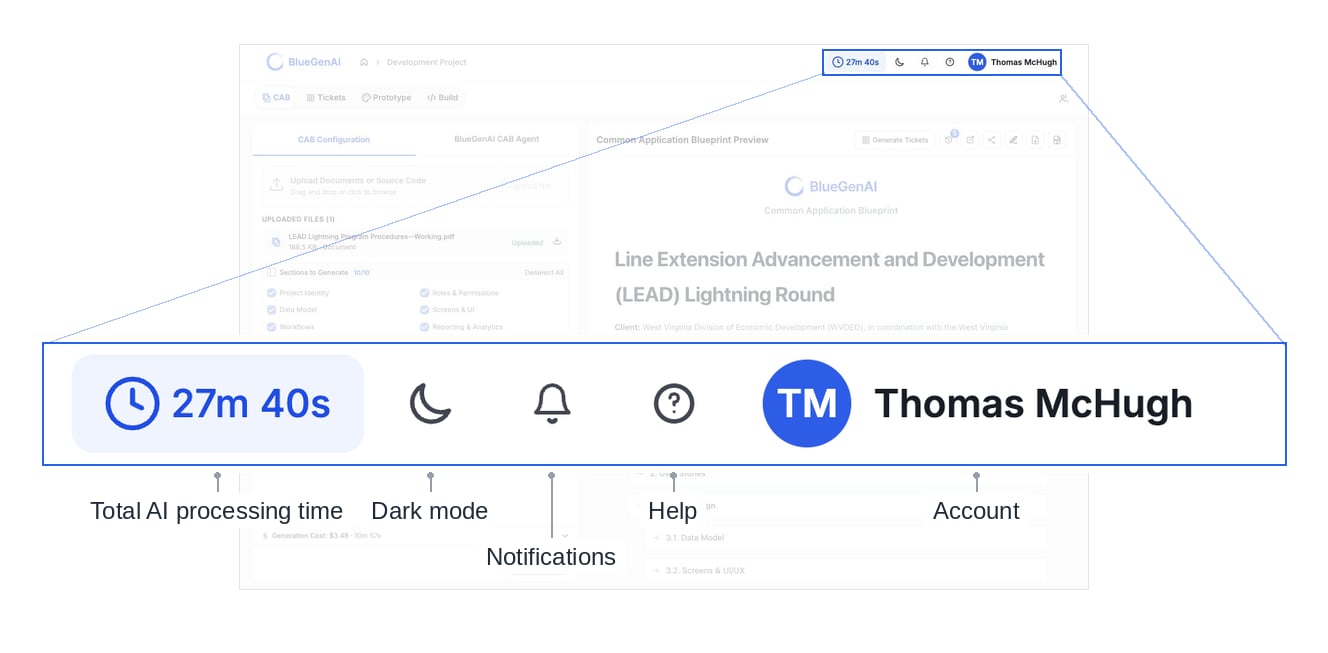
A magnified view of the top bar controls labelled Total AI processing time, Dark mode, Notifications, Help and Account, set against a faded view of the whole page so their position is clear.

The top bar, left to right.

Your Next Step

The fastest way to learn the layout is to move through it once.

Run a project end to end

Requirements to deployed application, in one pass.

Work with other people

Roles, invitations, and the two kinds of sharing.